"What man can you show me who places any value on his time, who reckons the worth of each day, who understands that he is dying daily?
For we are mistaken when we look forward to death; the major portion of death has already passed. Whatever years are behind us are in death's hands." - Lucius Annaeus Seneca
Pic of the day: Battersea power station in London, on the river Thames. This image is from the cover of the Pink Floyd album "Animals", released in 1977. Fun fact: This is two different power stations built in different decades - before and after WW2 - the second one was built to look similar to the first. An iconic and unmistakably beautiful four stack art deco power plant. From an era when beauty was also understood to be an important part of the landscape.
Inside of Battersea. Also glorious.
Back to a more mundane modern power plant! Below, a few more images of the steam turbine valve and bearing work.
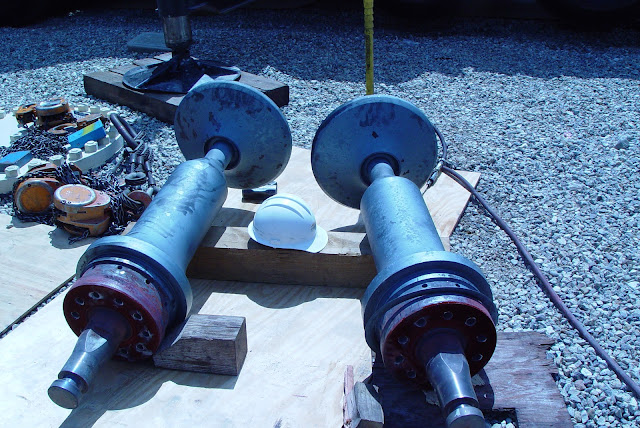
Hydraulic valve actuators prior to being sent off for refurbishment, and again after they arrived. In the lower image at the left are steam strainers that have been sandblasted with garnet media. These will be inserted into the turbine steam valve bodies shortly before closing them up.
Below: These mottled flaky deposits are known in the business as "blue blush". The millwrights tell me that all high pressure steam turbines have it, and it has nothing to do with boiler water chemistry problems. I've seen it before at other places, and apparently it's not a big deal.
Below: Image I took during an outage in 2006 - A bit of blue blush on some really big reheat control valves from a D-11 steam turbine.
Below: Battle Royale at the reheat valve. After completing the tedious business of removing each snapped off bolt head from the valve seat, the valve seat didn't want to come out. In this image, there is a reinforced steel plate pulling upwards slightly on the valve seat. Underneath is a 100 ton hydraulic press pushing upwards.
Most of the work is done by the hydraulic press underneath. You wouldn't want to put a lot of tension on the chains, and then have a 3-400 lb chunk of metal go flying end over end out of the hole like a flipped coin. In the end, the 100 ton hydraulic press blew a seal and that was the end of that for the rest of the shift. Eventually the next shift was able to get it out.
Below: New High Pressure valve parts coming together.
Below: High Pressure control valve
Below: High pressure steam valve bonnet, partially re-assembled.
View down into the High Pressure Control valve. Valve seat installed.
Below: View down into one of the reheat valves from the turbine deck.
Below: Trash. Used valve seats, stems and disks. Mostly superalloy stuff. The welding tracks inside the seats were to heat the ring to help break it free from the valve body.
Below: A hydraulic motor operates this thread-chasing tool. Here, a magnetic base hydraulic motor turns a tap into threads in the valve body after the bonnet retaining bolt has been drilled out. Interestingly the drilling out is more of a "coring" operation. It's like a really deep hole saw that is just smaller than the bolt. At the end of the process, the core of the bolt comes out.
Below: Tilting pad journal bearings. To my eye they look a bit rough, but I'm not an expert.
Below: Brand new Tilting Pad thrust bearings. One on the shelf, and one already installed. An item of industrial beauty.
Below: Hopefully we will get these installed soon and make sure everything mates up, and be on our way back to operation.


1 comment:
Helpful blog! The section on pressure and temperature ratings was explained very well.
PTFE-lined Butterfly Valve manufacturers in China
Post a Comment