The reason I own this vise is due to the onset of dementia in a family member, and the fact that they had to be placed in a care facility. I'd have preferred that he kept his mental health and the vise, but that wasn't my choice to make.
I stored it underneath the stairs in the shop, because I don't have any need for such an enormous vise. To be honest, it's a lot more robust and heavy than any bench I own. Although I don't really have a decent place to install such a large vise, I caught the bug to restore it after watching several restoration videos.
The thing weighs in at 137 lbs, and it was all I could do to lift it up onto the work bench to begin stripping it down. Below are a few pictures I took before getting started, after dragging it out from underneath the stairs.
The handle is bent. Of course it is. Why would you damage such an awesome vise?
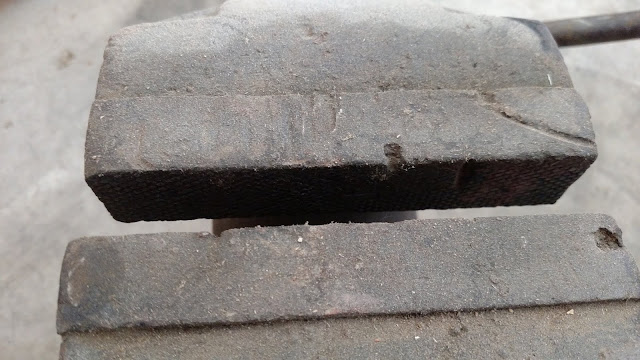
The jaws are pretty chewed up as well. This thing was rode hard and put away wet.
The next several pictures are of disassembly on the bench.
The retaining screws for the jaws were quite corroded, but they were not too difficult to remove. The jaws are damaged beyond repair though. There is no point trying to repair these.
Really bent.
Instead of hammering the arms and bending them further, I removed them with a wrench. I don't understand why the arms would get damaged when you could lock the swivel better with a wrench.
Below: Someone welded the hold-down bolts to the base plate. I'm *not* happy about this, but I'm not going to make it original. That would require me to grind off the welds, repair any damage to the metal ring, and then replace the bolts. Probably half a day's work, and it wouldn't even make a difference in how well it locks the swivel down.
Below: The slide is covered with nasty old grease, but at least the machined parts under the grease haven't corroded.
To remove the jack screw and handle assembly, you first have to remove the retaining plate. Getting the screws out of the retaining plate required the use of a manual impact driver. The screws are not the same length, and they are bent, so these will have to be replaced. I need to run a thread chaser down the holes to clean them out.
Retaining plate, with the screws removed. Now I can remove the handle and jack screw assembly.
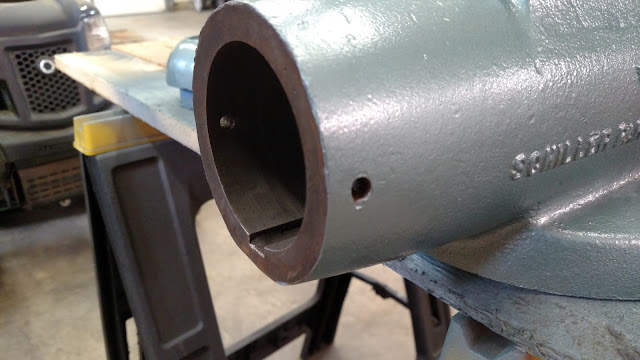
Almost done. The jack screw and handle are now out. The next step is to remove the piece that the jack screw threads into. This piece sits inside the stationary "bullet" part on the right.
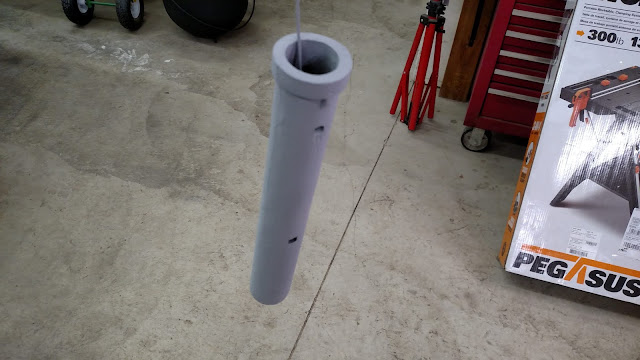
Below: This internal piece is what the jack-screw threads into, allowing the vise to open and close. The roll-pins (left and right) retain this tube inside the body , and they are pretty chewed up.
Below: I used a grinding wheel to remove knobs of welding spatter from the moveable section. After that, I smoothed it somewhat with 100 grit garnet sandpaper. I have no interest in turning this into a showpiece, so I didn't fill in the dents or try to obtain a super-smooth surface - this will be a working tool. I cleaned up the shaft with fine sandpaper.
The screw holes for the removable jaws were full of corrosion. I used a Dremel with a de-burring bit to clean these out.
The moveable section is cleaned up as much as it's going to be.
It's not perfect. It just looks a bit better.
These swivel retainers were pretty rusty. I went over them with a wire wheel before spraying them with Permatex Rust Treatment. I'm not that happy with the result though, because they still look slightly rusty. I will probably do some more sanding.
Yes, the inside bore needs to be cleaned.
The flat anvil section of this vise had a large high spot in the center where a welding puddle had cooled. You can clearly see the high spot two photos above. There were also several dings that created low spots. I ground the weld off, and then used the palm sander with 60 grit and 100 grit in an attempt to get it flat.
Below: Halfway through removing material to get a flat anvil surface. Eventually I got the entire surface flat and reasonably smooth. It still has some dents, but it's much better than it was. If I had a milling machine, I could get this part of the vise flat in minutes, but I have to do it by hand.
Below, the internal threaded section. The inside will be greased.
Replacement jaws are still available for this old fella! I'll make some copper covers for these. That way the vise will be able to grip items without putting teeth marks in them. I might have a pair made from flat copper, using these as templates.
Next, I straightened out the handle as well as I could with a 10 lb sledge hammer. Then I sanded the handle it to brighten it up. The end of the jack screw had rusted, so I sanded that smooth. I sanded the retaining plate. I will probably put more finish work into the exposed metal parts, and try to get them a bit shinier. Most of the deeper dents still show corrosion. I was pretty worn down after a couple of days working on this project, and I stopped before I was really satisfied with the cosmetic condition of all the shiny parts.
Below: The old jaws, screws, and roll pins are on the right, and the replacements are on the left.
I went to both Lowe's and Home Depot, searching for the correct paint, but neither of them had Krylon Verde Hammered spray paint.
I ordered a couple of cans from Amazon, and delivery is due soon. When I get the paint. I'll update and finish the post with paint and re-assembly.
***UPDATE***
The paint finally arrived, and after it had a chance to warm up, I started the finish work.
Below: Test shot on the base.
Second coat.
I purchased two different types of 10-32 screws to replace the old ones (front). In the end, I decided the stainless steel hex screws looked best (right)
I spent another 30 minutes or so with the wire wheel on the handle and jack-screw.
Tapped out the holes that the 10-32 retaining plate screws are set into.
The top hole has been re-tapped, but not the others.
The previous vise had to go. It's a 3", while the restored one is a 6". Serious weight difference.
Greasing all the sliding metal surfaces.
A look inside the stationary part - now cleaned up.
Side view, where the roll-pins hold the screw and tail-piece in place.
The rust treatment on the hold-down levers got the wire wheel as well.
Base set in place, end piece needs to be tapped in.
Jack-screw installed, sliding part greased, ready to install. Big mistake - it kept rolling upside down in my greasy palms.
Below: Tail piece and internal screw threads in place and pinned.
Side by side with the old one. I have a metallic silver marker and will highlight the text shortly.
I finally had a chance to put silver lettering on the text. I'm not sure if I like it or not.
A week ago. I'm pretty happy with the results, even if I did have to breathe a bit of metallic junk. Respirators are a bit hard to come by at the moment, due to a certain virus that is making the rounds.


6 comments:
This will be something that your great grand kids will be using! Tools like this are becoming rare.
Yeah hopefully grand-kids someday. Or a son-in-law. I'm pretty sure my daughter isn't interested. Whoever gets it will have to move it themselves though!
I'm not sure why, but I have really started to enjoy taking old things apart and renewing them. Or maybe it's just the carb cleaner vapor in an enclosed space :)
Everything has it's pros & cons!
Nice job on the vise! Just 2 comments. Most of the Wilton bullet vises I have taken apart have tapered pins that hold the back nut together. They must be removed from the inside OUT... or you could crack the cast nut. Also the back nut is missing its "dust cover" that is why the lead screw was rusty.
Thanks for the kind words! Any idea where I can locate a dust cover? It doesn't need one now to keep water out, because it's in a humidity controlled shop, but it wouldn't hurt to keep metal bits out of the mechanism. Looks like I got lucky driving the roll pins out, especially considering the corrosion.
Mark, you did a real bang up job here. It really looks almost as good as it probably did in the mid 60s. The paint is classic colours and the silver colour for the lettering makes it really pop.
I found your blog here by trying to research the vise at work. I too served on a sub at the tail end of the cold war. You can catch me in the Nuclear Power School forum on Facebook or @nuclrengnr on Twitter. I hope you are thoroughly enjoying your "new" vise.
R/
Eugene Moore
Post a Comment